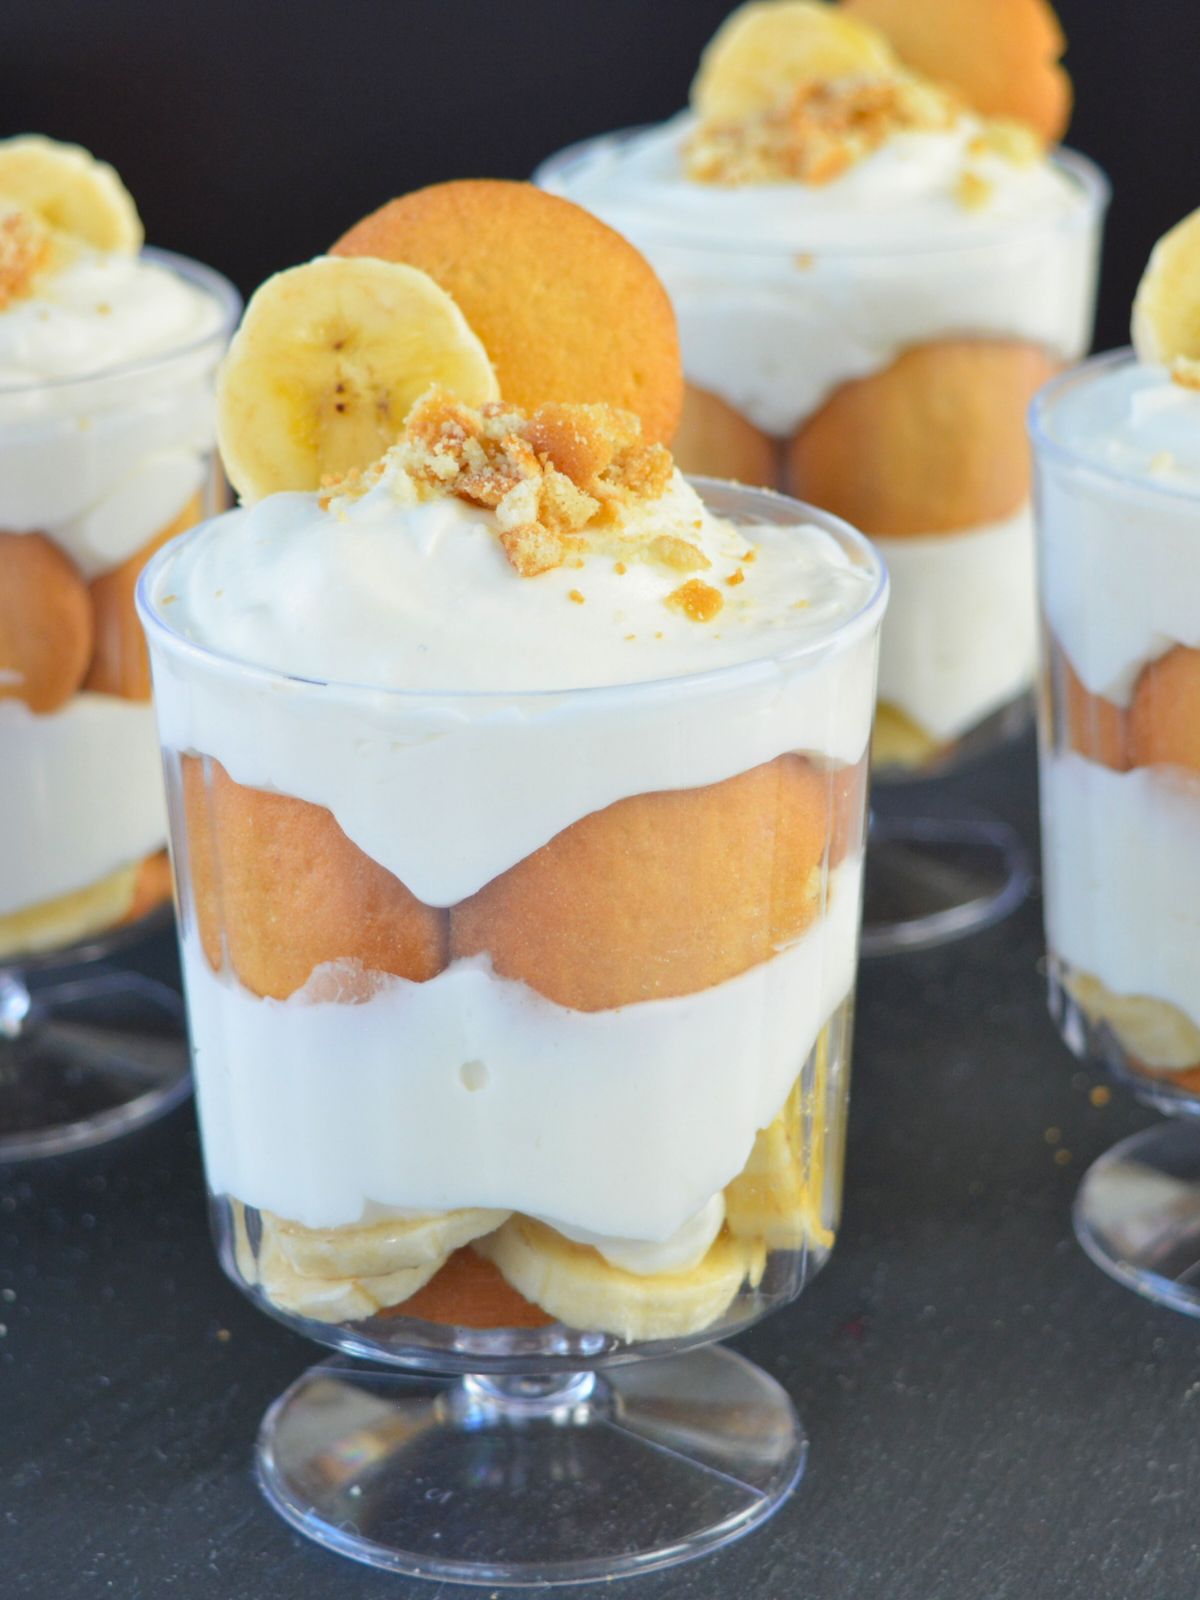
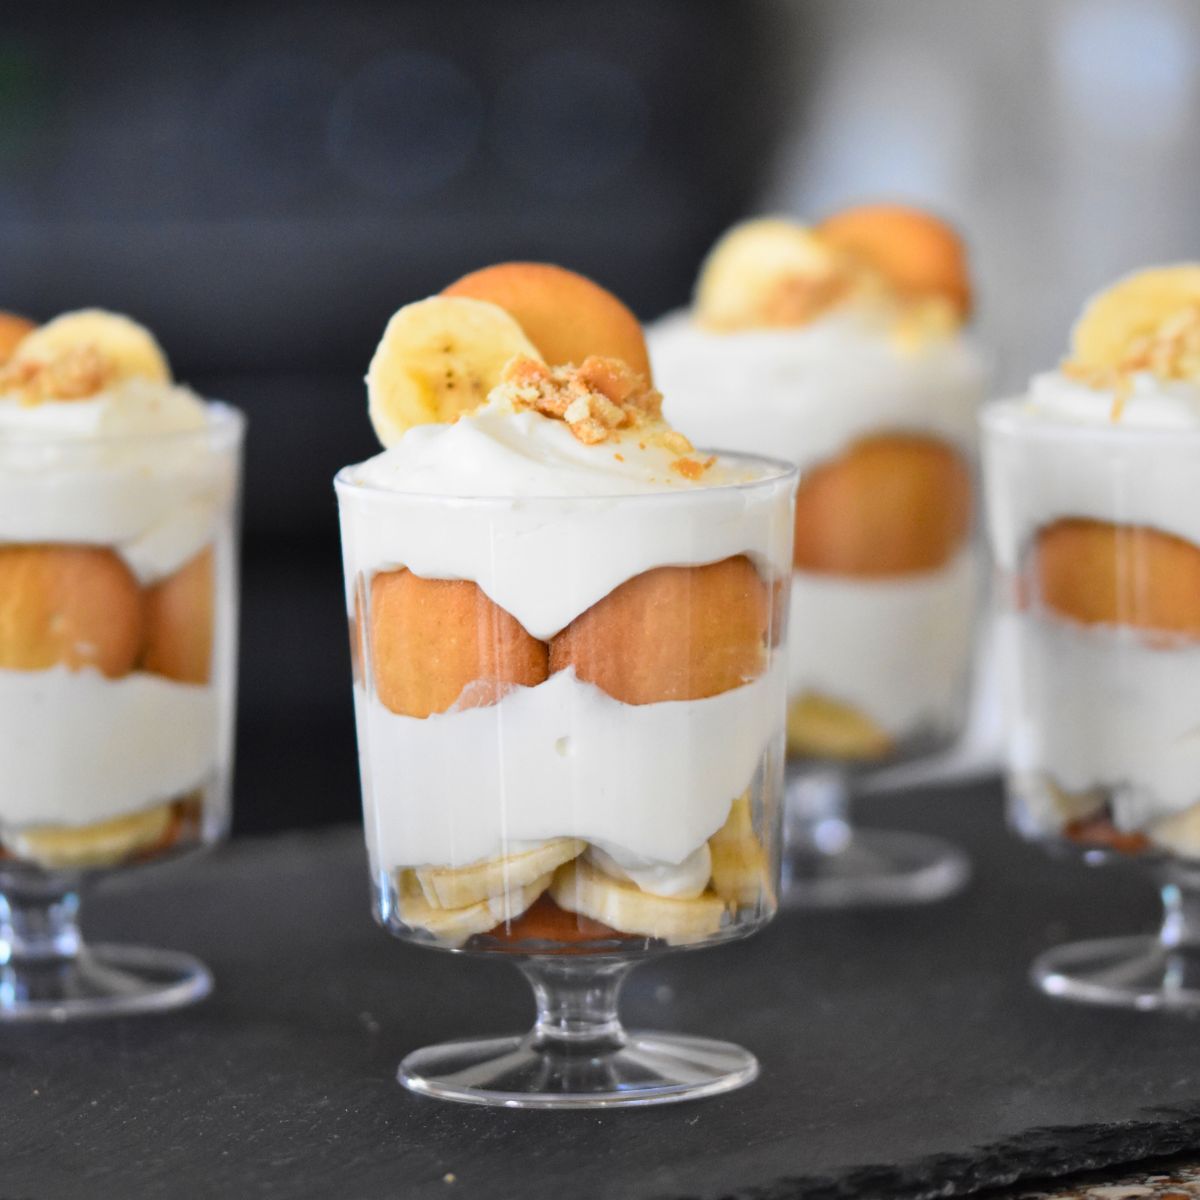
These individual banana pudding cups are incredibly easy and delicious, crafted with layers of vanilla pudding, bananas, and vanilla wafers. Perfect for gatherings or to simply satisfy a sweet craving.
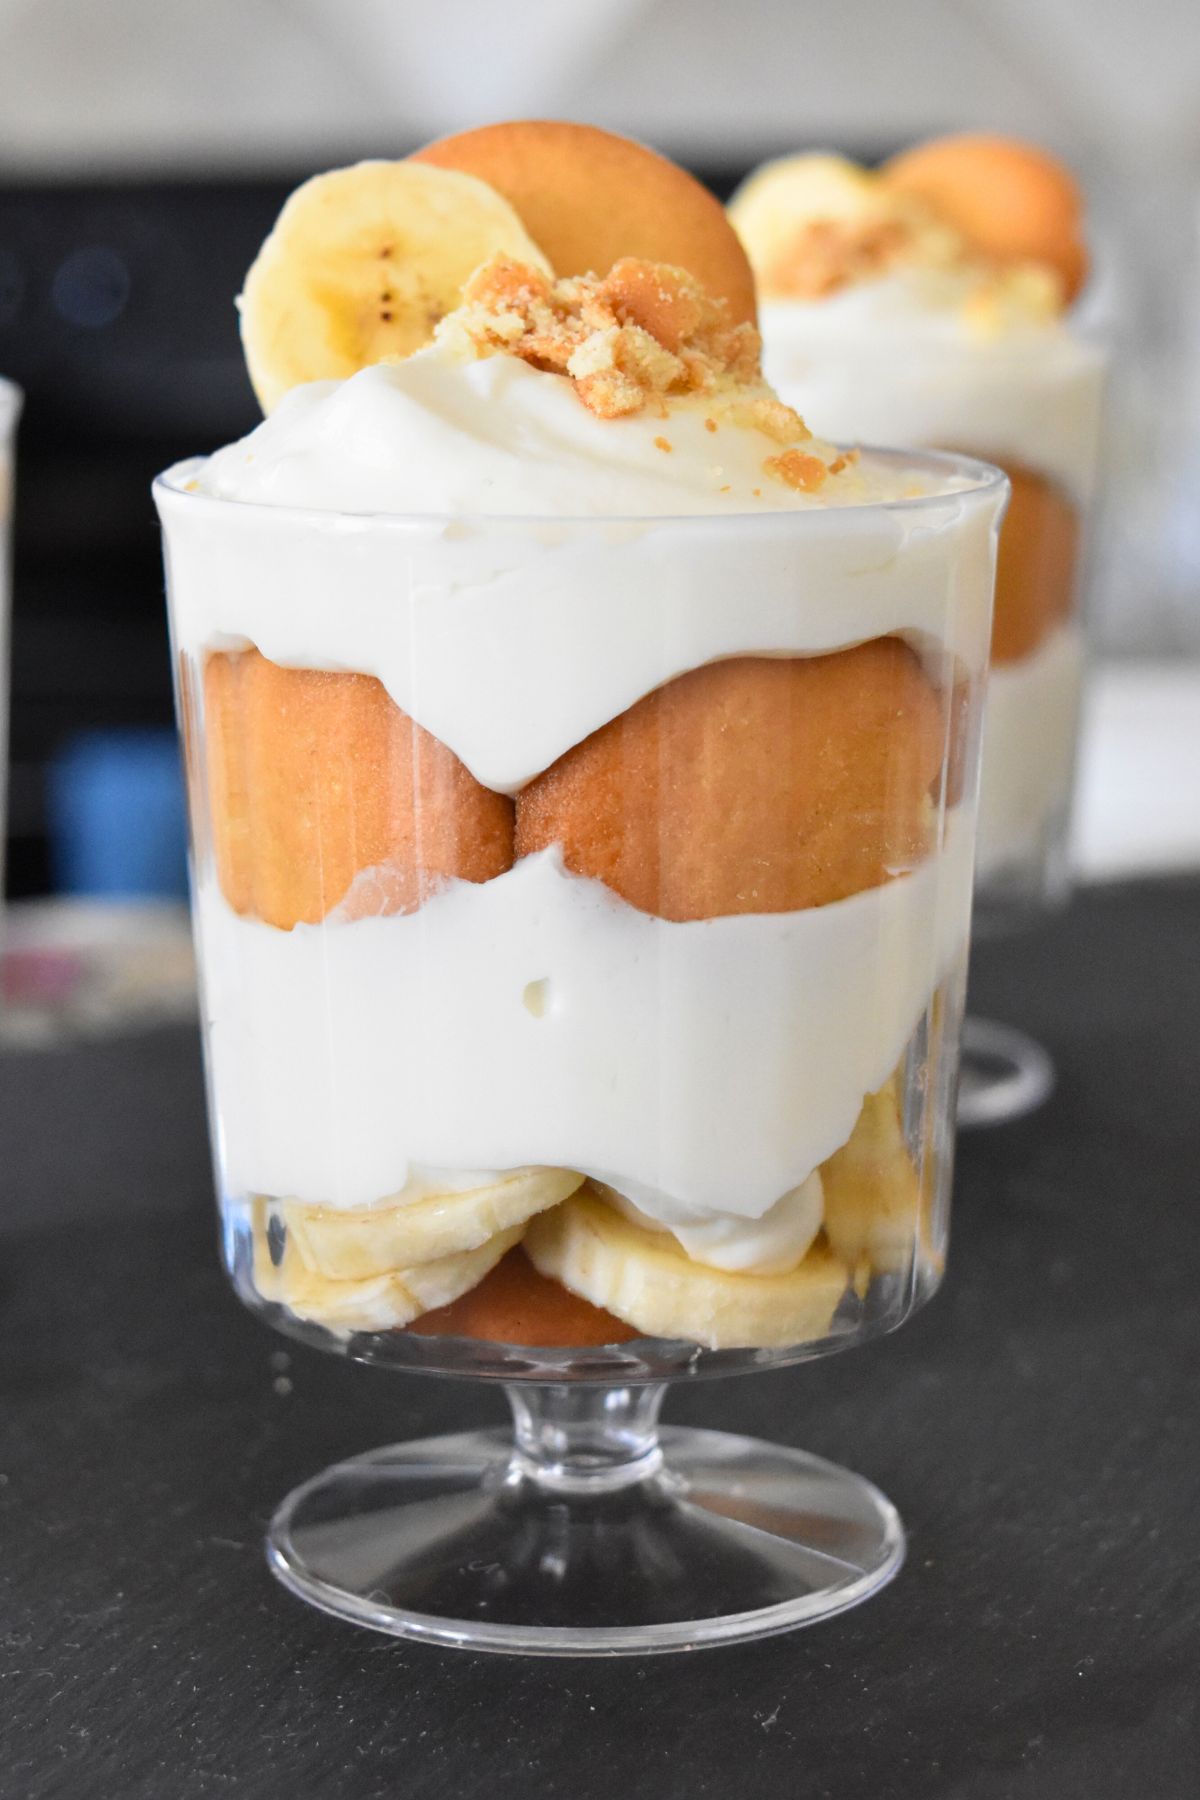
This recipe is great because it's easy and tasty. It uses vanilla pudding, bananas, and whipped cream in layers. You can make it quickly for any time you want something sweet.
If you are looking for more easy desserts try my No Bake Strawberry Cheesecake Cups, The Best Banana Nut Muffin and Chocolate Banana Milkshake.
Jump to:
Ingredients
- Milk: Use whole milk which provides the creamy base for the pudding, enhancing its texture and richness when combined with other ingredients.
- Sugar: I use only 2 tablespoons of granulated sugar because of vanilla wafers and condensed milk.
- Cornstarch: Acts as a thickening agent in the pudding, helping to achieve the desired consistency and smoothness.
- Sweetened Condensed Milk: Offers additional sweetness and richness to the pudding mixture, contributing to its creamy and indulgent taste.
- Whipping Cream : Adds a fluffy and airy texture to the dessert when whipped, making it light and complementing the layers of the pudding. You can use store bought cool whip.
- Vanilla: Enhances the overall flavor profile, imparting a subtle yet essential aromatic sweetness to the pudding cups.
- Vanilla wafers: Form the base and layers within the dessert, providing a crunchy contrast to the creamy pudding and bananas.
- Banana: You'll need 2 large or 3 small bananas, thinly sliced.
How to make banana pudding cups
- Prepare the Pudding Mixture:
- In a saucepan, add milk, sugar and cornstarch. Stir until the cornstarch dissolves completely.
- Whisk continuously over medium heat until the mixture thickens.

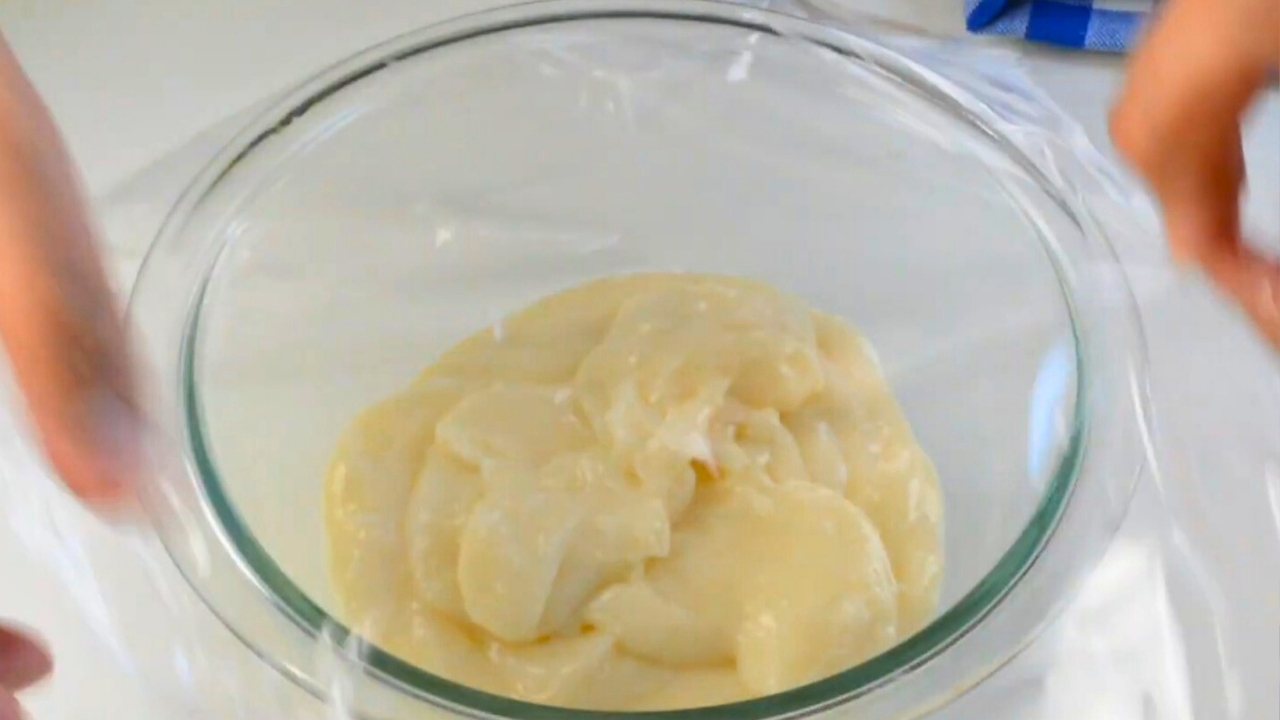
- Once thickened, remove the saucepan from heat and stir in sweetened condensed milk. Transfer the pudding in another bowl and cover it with plastic wrap and refrigerate for 10 minutes.
2. Whip the Cream:
- In a separate mixing bowl, whip whipping cream until it forms stiff peaks. Add vanilla and pudding and mix until combined.

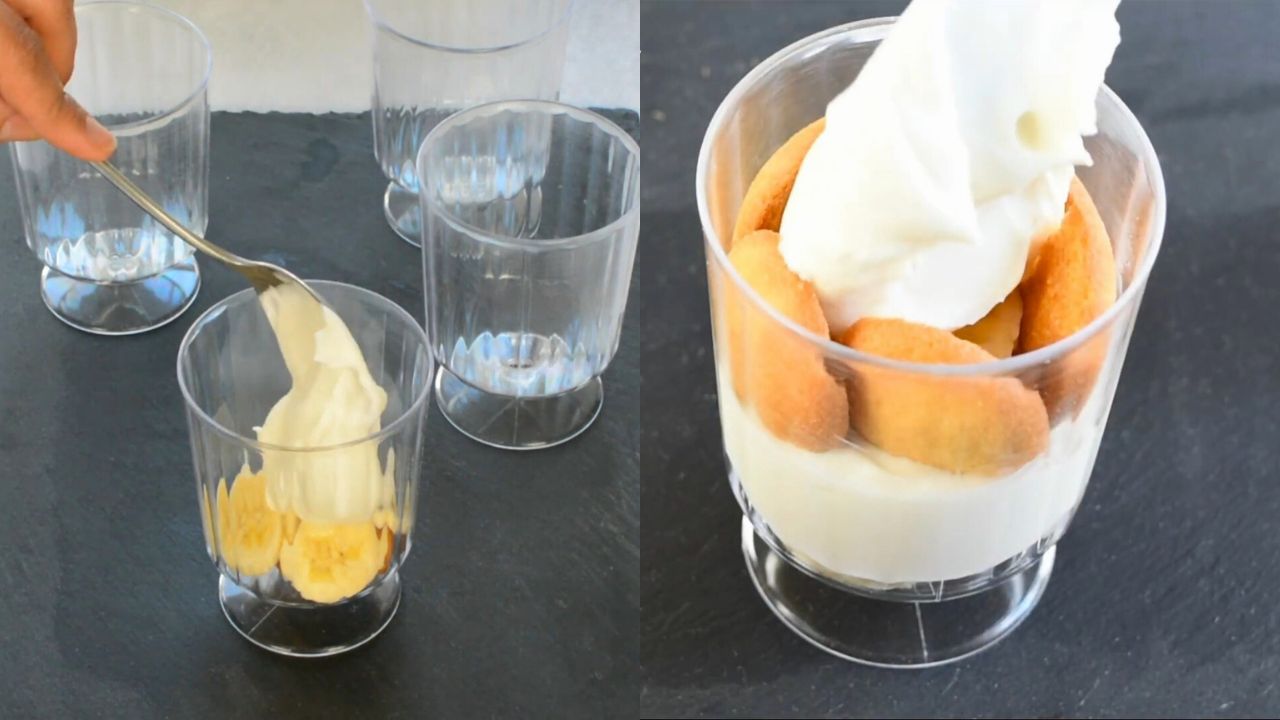
3. Assemble the Banana Pudding Cups:
- Start by layering the bottom of individual cups or a large serving dish with Nilla Wafers.
- Place a layer of sliced bananas on top of the wafers.
- Spoon a layer of the prepared pudding mixture over the bananas.
- Repeat the layers until the cups are filled, decorate with crushed vanilla wafers and banana slice.
4. Chill and Serve:
- Cover the cups or dish with plastic wrap and refrigerate for at least 1 hour or until thoroughly chilled.
Helpful tips
- Ripe Bananas: Use ripe but firm bananas for the best flavor and texture. They should be sweet and not overly mushy.
- Layering Technique: Layer the ingredients strategically to ensure every spoonful has a perfect blend of flavors and textures. Start with a base of Nilla Wafers, then bananas, pudding, and finally whipped cream.
- Pudding Consistency: Ensure the pudding mixture is adequately thickened before layering. This helps in maintaining the structure of the dessert and prevents it from becoming too runny.
- Whipped Cream Texture: Whip the cream until stiff peaks form, but be careful not to over-whip it, as it might turn into butter. Gently fold in the vanilla extract for added flavor.
- Chilling Time: Allow the assembled pudding cups to chill in the refrigerator for at least 1 hour to 4 hours. This chilling time allows the flavors to meld together and results in a better-set dessert.
- Serving Freshness: While banana pudding cups can be made ahead, for the best taste and texture, it's recommended to consume them within a day or two of preparation.
- Personalize: Feel free to personalize your banana pudding cups by adding a sprinkle of cinnamon or nutmeg on top, or even a drizzle of caramel or chocolate sauce for extra indulgence.
- Presentation: To make each serving more appealing, consider topping each cup with a banana slice or a single Nilla Wafer or crushed wafers just before serving.
Faqs
Yes, banana pudding cups can be made ahead of time. In fact, allowing them to chill in the refrigerator for a few hours or overnight can enhance the flavors and texture.
Yes, you can.
Yes, you can make substitutions based on dietary preferences or restrictions. Use dairy-free milk alternatives and gluten-free cookies for a suitable alternative.
When properly covered, banana pudding cups can last for up to 2-3 days in the refrigerator. However, for the best taste and texture, it's recommended to consume them within a day or two.
Freezing may alter the texture of the pudding and bananas, resulting in a less desirable consistency. It's best to enjoy them fresh or refrigerated.
Absolutely! Feel free to experiment with other fruits like strawberries or blueberries. Toppings such as toasted coconut, chopped nuts, or chocolate shavings can also add delightful variations.
Yes, the sweetness can be adjusted to your preference. You can reduce or increase the amount of sugar based on how sweet you prefer your dessert.
It's better to assemble the cups a few hours before serving or overnight to allow the flavors to meld together. However, adding the whipped cream topping just before serving helps maintain its texture and appearance.
More delicious dessert recipes
Banana pudding cups recipe video

📖 Recipe
Banana pudding cups
Equipment
- 6 mini glass or plastic dessert cups
Ingredients
- 1 cup whole milk
- 2 tablespoon sugar
- 2 tablespoon corn starch
- ⅓ cup sweetened condensed milk
- 1 ½ cup whipping cream or cool whip
- ½ teaspoon vanilla extract
- 5 ounces mini vanilla wafers
- 2 bananas, medium
Instructions
For the pudding
- In a saucepan, add milk, sugar and cornstarch. Stir until the cornstarch dissolves completely. Whisk continuously over medium heat until the mixture thickens.
- Once thickened, remove the saucepan from heat and stir in sweetened condensed milk. Cover the pudding with plastic wrap and refrigerate for 10 minutes.
For the homemade whipped cream
- In a separate mixing bowl, whip whipping cream until it forms stiff peaks. Add vanilla extract and pudding. Mix until combined.
To assemble the banana pudding cups
- Start by layering the bottom of individual cups with Nilla Wafers.
- Place a layer of sliced bananas on top of the wafers.
- Spoon a layer of the prepared pudding mixture over the bananas.
- Repeat the layers until the cups or dish are filled, ending with a layer of whipped cream on top.
- Cover the cups or dish with plastic wrap and refrigerate for at least 1 hour or until thoroughly chilled.